Sunday, June 25, 2023

Tips to Create the Illusion of a Spacious Room

Tips to Create the Illusion of a Spacious Room

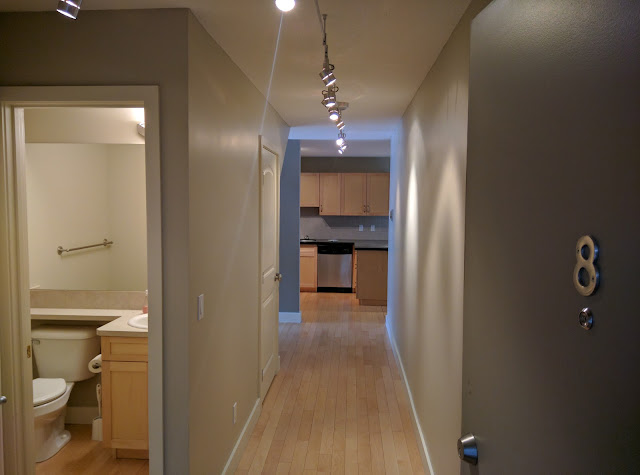
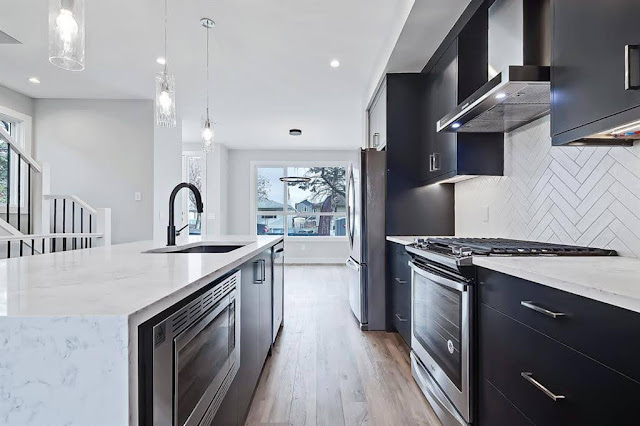
Creating the illusion of a larger space can greatly enhance the aesthetics and functionality of a room. While physically expanding the room may not always be feasible, there are several clever techniques that can make a room appear more spacious. By implementing these tips, you can transform even the smallest of spaces into open and inviting areas.

Opt for Light Colors:

When it comes to paint choices, lighter hues are your best friend. Pale shades, such as soft whites, pastels, and light grays, reflect more light and create a sense of airiness. Painting the walls, ceiling, and trim in similar tones helps eliminate visual boundaries, making the room feel larger and more cohesive.

Utilize Strategic Lighting:

Proper lighting can significantly affect the perception of space. Maximize natural light by keeping windows clear of heavy drapes or furniture. Sheer curtains or blinds can provide privacy without blocking sunlight. Additionally, incorporate a mix of ambient, task, and accent lighting to brighten up dark corners and visually expand the room.

Mirrors: A Reflective Trick:

Mirrors are a classic technique for creating the illusion of space. Strategically placing mirrors across from windows or near light sources can reflect natural and artificial light, instantly adding depth to the room. Full-length mirrors or mirrored wall panels are particularly effective in visually expanding the space.

Declutter and Organize:

A cluttered room feels cramped and chaotic. Embrace minimalism by decluttering and organizing your space. Remove unnecessary items and find clever storage solutions to keep belongings out of sight. Streamlined surfaces and open areas create an uncluttered atmosphere that promotes a sense of spaciousness.

Furniture Placement and Size:

Carefully consider the size and arrangement of furniture. Bulky pieces can overwhelm a small room, so opt for furniture with sleek profiles and raised legs to create a more open feel. Use multifunctional furniture, such as ottomans with hidden storage, to maximize utility without sacrificing space. Arrange furniture away from walkways to maintain a smooth flow and make the room feel less crowded.

Vertical Emphasis:

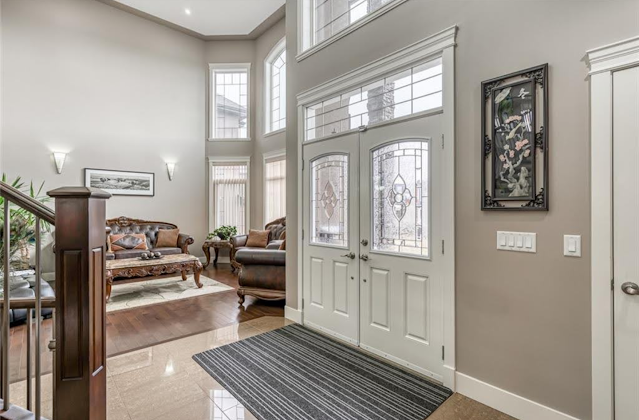
Draw the eye upward to create the perception of height. Use vertical design elements like floor-to-ceiling curtains, tall bookcases, or vertical artworks to accentuate the room's height. This simple trick adds a sense of grandeur and expansiveness to the space.

Flooring and Rugs:

Flooring plays a vital role in visually expanding a room. Light-colored flooring, whether it's hardwood, laminate, or carpet, can make the space feel more open. A continuous flooring material throughout the room creates a seamless flow, eliminating visual boundaries. If using rugs, choose lighter shades and avoid large patterns that may overpower the space.

Conclusion:

With the right techniques, you can create the illusion of a larger room, regardless of its actual size. By incorporating light colors, strategic lighting, mirrors, decluttering, thoughtful furniture placement, vertical emphasis, and appropriate flooring choices, you can transform any space into a visually spacious and inviting area. Remember, it's all about optimizing the available resources and creating a harmonious atmosphere that enhances the perception of openness.

Common Ceiling Painting Mistakes and How to Avoid Them

Common Ceiling Painting Mistakes and How to Avoid Them

Achieving a flawless and well-painted ceiling can significantly enhance the overall aesthetics of any room. However, there are several common mistakes that people often make when painting ceilings. In this article, we will explore these mistakes and provide valuable tips on how to avoid them, ensuring a professional and polished finish for your ceiling.

Insufficient Preparation:

One of the most critical aspects of any painting project is proper preparation, and this is equally true for ceiling painting. Many people make the mistake of neglecting the preparation process, leading to subpar results. Before starting, make sure to thoroughly clean the ceiling surface, removing any dust, dirt, or cobwebs. Use a mild detergent and water solution to eliminate any stains or grease marks. Additionally, don't forget to protect your furniture and floors by covering them with drop cloths or plastic sheets.

Inadequate Priming:

Priming the ceiling is an essential step that should not be overlooked. Primer helps create a smooth and uniform surface, allowing the paint to adhere better and achieve a more even finish. Skipping the primer may result in uneven color distribution and poor adhesion. Use a high-quality primer suitable for your ceiling material, whether it is drywall, plaster, or a different type of surface. Apply the primer evenly using a roller or brush, ensuring complete coverage.

Choosing the Wrong Paint:

Selecting the right paint for your ceiling is crucial for a successful outcome. Many individuals mistakenly use the same paint intended for walls on their ceilings, leading to disappointing results. Ceiling paints are specifically formulated to have a flat finish, minimizing light reflection and reducing imperfections. Opt for a high-quality ceiling paint that is designed to provide excellent coverage and hide any flaws or blemishes. Matte or flat finishes are generally recommended for ceilings.

Poor Lighting Considerations:

Lighting plays a significant role in how your ceiling appears. Neglecting proper lighting considerations can negatively impact the overall look of the painted surface. Take into account the natural and artificial light sources in the room and observe how they interact with the ceiling. It's advisable to test paint samples on a small section of the ceiling to see how they react under different lighting conditions. This will help you choose the right paint color that complements the room's lighting ambiance.

Ignoring Safety Measures:

Ceiling painting can be physically demanding and potentially hazardous if proper safety measures are ignored. Many people overlook safety precautions, such as wearing protective eyewear, gloves, and a dust mask. Additionally, consider using a sturdy ladder or scaffolding to reach high ceilings safely. Avoid overreaching or standing on unstable surfaces. Prioritize safety throughout the painting process to prevent accidents and ensure a smooth and stress-free experience.

Rushing the Process:

Painting a ceiling requires patience and attention to detail. Rushing through the job can result in uneven coverage, streaks, and other imperfections. Take your time to apply the paint in even strokes, working systematically across the ceiling. Avoid overloading the brush or roller, as it can cause drips and splatters. Allow each coat to dry completely before applying subsequent layers. Patience and careful execution will yield a beautifully painted ceiling.

Conclusion:

By being mindful of these common ceiling painting mistakes and following the tips provided, you can avoid them and achieve a flawless, professionally painted ceiling. Remember to invest time in thorough preparation, choose the right paint, consider lighting aspects, prioritize safety, and avoid rushing through the process. With attention to detail and proper execution, your ceiling will become a visually pleasing element that enhances the overall appeal of your living space.

Saturday, June 24, 2023

Interior Painting Tips: Master the Art of Wall Painting

Interior Painting Tips: Master the Art of Wall Painting

Painting your walls is an excellent way to refresh the look of your home and add a personal touch to your interior design. With the right tools, techniques, and a little creativity, you can achieve professional-quality results that will transform your living space. This comprehensive guide will provide you with expert tips and step-by-step instructions to help you paint your walls like a pro.

Prepare and Plan:

Before diving into your painting project, take the time to prepare and plan. Follow these essential steps:

a:) Clear the area: Move furniture, decorations, and other items away from the walls. Cover the floor and any remaining furniture with drop cloths or plastic sheets to protect them from paint splatters.

b:) Repair and clean the walls: Fill in any holes or cracks with spackle or putty. Sand down rough areas and wipe the walls clean of dust and dirt using a damp cloth. This ensures a smooth surface for paint application.

c:) Choose the right paint: Consider the type of paint that suits your needs. Latex-based paints are popular for interior walls due to their ease of use, quick drying time, and low odor. Oil-based paints provide a more durable finish but require longer drying times and proper ventilation.

d:) Select the color scheme: Explore different color palettes and consider the mood and ambiance you want to create in each room. Take into account the existing decor, furniture, and lighting to ensure harmony and cohesion.

Gather the Necessary Tools:

To achieve professional results, gather the following tools:

a:) Paint rollers and brushes: Choose high-quality brushes and rollers suitable for the type of paint you're using. A 3-inch angled brush is ideal for cutting in and painting edges, while a roller with a medium nap works well for large wall surfaces.

b:) Paint tray and liners: Use a sturdy paint tray and line it with disposable liners for easy cleanup and color changes.

c:) Painter's tape: Use painter's tape to protect trim, baseboards, and other areas you don't want to be painted. Apply it carefully, ensuring it adheres tightly to the surface to prevent paint bleed.

d:) Extension poles: These handy tools attach to paint rollers, allowing you to reach high walls and ceilings comfortably.

e:) Paint edger tool: Edging tools make it easier to paint along edges, corners, and intricate details, providing clean lines and a professional finish.

f:) Drop cloths or plastic sheets: Cover floors, furniture, and any remaining items with drop cloths or plastic sheets to protect them from paint splatters.

Follow the Proper Technique:

To achieve flawless results, employ these techniques:

a) Cutting in: Before using a roller, cut in the edges and corners with a brush. Dip the brush into the paint, tap off the excess, and paint a 2-inch strip along the edges. Take your time to ensure precise lines and smooth transitions between walls and trim.

b) Rolling technique: Pour paint into the tray and roll the roller back and forth until it's evenly coated. Begin rolling from the top corner of the wall, working in a "W" or "M" shape to cover a 2-3 square foot area. Apply light pressure initially, then gradually increase for even coverage. Reload the roller as needed to maintain a consistent coat.

c) Work in sections: Divide the wall into manageable sections, painting one section at a time. Maintain a wet edge to avoid visible brush or roller marks. Overlap each stroke slightly with the previous one for seamless blending.

d) Multiple coats: Most paint jobs require at least two coats for full coverage. Allow each coat to dry completely before applying the next. Follow the paint manufacturer's instructions for recommended drying times

Pay Attention to Details:

a) Paint trim and baseboards: Once the walls are fully painted and dried, it's time to tackle the trim and baseboards. Use painter's tape to protect the freshly painted walls, and carefully paint the trim using a smaller brush or an edging tool. This step adds a polished look to your paint job.

b) Sand between coats: For a smooth and professional finish, lightly sand the walls between coats. Use fine-grit sandpaper to gently sand any imperfections, bumps, or ridges. Wipe away the dust with a clean cloth before applying the next coat of paint.

c) Remove painter's tape at the right time: It's essential to remove painter's tape before the paint fully dries to prevent peeling. Wait for the paint to reach a tacky but not wet stage, and slowly and carefully remove the tape at a 45-degree angle. This ensures clean edges and avoids damaging the paint.

Enhance Your Technique:

a) Experiment with different finishes: Explore various paint finishes to add depth and texture to your walls. Matte finishes are perfect for concealing imperfections, while satin and eggshell finishes offer a subtle sheen and are easy to clean. Semi-gloss and high-gloss finishes provide a durable and glossy appearance, ideal for trim and doors.

b) Use a paint grid: Instead of using a traditional paint tray, try a paint grid attached to the bucket. The grid allows you to evenly load the roller with paint and eliminates the risk of overloading or dripping.

c) Work with a partner: Painting large areas can be time-consuming, so consider enlisting the help of a friend or family member. One person can cut in while the other rolls, increasing efficiency and reducing fatigue.

d) Experiment with accent walls: Add personality and visual interest to a room by painting an accent wall. Choose a contrasting color or a complementary shade that complements the overall color scheme. Accent walls can highlight architectural features or serve as a focal point for the room.

Clean Up and Maintain:

a) Clean your brushes and rollers: After completing your painting project, clean your brushes and rollers thoroughly to prolong their lifespan. For latex-based paints, rinse brushes and rollers with warm soapy water. For oil-based paints, use mineral spirits or paint thinner. Allow them to dry completely before storing.

b) Store leftover paint properly: Seal any leftover paint in airtight containers to prevent drying out. Label the containers with the paint color, brand, and room where it was used for future touch-ups or reference.

c) Perform regular touch-ups: Over time, walls may experience wear and tear. Perform regular touch-ups to keep your walls looking fresh and vibrant. Keep a small amount of leftover paint for each room to address minor scuffs, scratches, or dings.

Conclusion:

With the right preparation, tools, and techniques, you can achieve professional-quality results when painting your walls. Remember to plan ahead, gather the necessary tools, and follow the proper techniques to ensure a smooth and flawless finish. Pay attention to details, experiment with finishes, and maintain your painted walls for long-lasting beauty. Whether you're refreshing the entire house or adding a splash of color to a single room, painting like a pro will transform your living space and create a personalized ambiance that reflects your style.
Sunday, June 18, 2023

A Comprehensive Guide to Ceiling Repair Costs: What to Expect

A Comprehensive Guide to Ceiling Repair Costs: What to Expect

When it comes to home maintenance, ceiling repairs are often necessary to address issues such as cracks, water damage, or sagging. Understanding the potential costs involved in ceiling repairs can help homeowners plan their budget and make informed decisions. In this guide, we'll provide you with a comprehensive overview of ceiling repair costs, including factors that influence the expenses, common repair types, and tips for saving money along the way.

Factors Affecting Ceiling Repair Costs:

Several factors can influence the cost of repairing a ceiling. It's important to consider these factors to get a better understanding of the potential expenses involved:

Type and Extent of Damage: The severity and type of damage to your ceiling will have a significant impact on repair costs. Small cracks and minor water stains will generally be less expensive to fix than major structural issues or extensive water damage.

Ceiling Height: The height of the ceiling can also impact repair costs. Repairing a standard-height ceiling is usually more straightforward and less labor-intensive compared to repairing a high ceiling or a vaulted ceiling, which may require additional equipment and expertise.

Ceiling Material: The material of your ceiling can influence repair costs as well. Common ceiling materials include drywall, plaster, and popcorn ceilings. Each material requires specific repair techniques and materials, which can affect the overall cost.

Accessibility: The accessibility of the damaged ceiling area plays a role in determining the repair costs. If the damaged section is easy to access, the repair process may be quicker and more affordable. However, if the ceiling is obstructed by furniture, fixtures, or other obstacles, additional time and effort may be required, potentially increasing the expenses.

Common Ceiling Repair Types and Their Costs:

Here are some common types of ceiling repairs along with their approximate costs:

Patching Small Cracks: Minor cracks in the ceiling can usually be repaired with patching compound or joint compound. The cost typically ranges from $50 to $150, depending on the size and number of cracks.

Water Damage Restoration: Repairing water-damaged ceilings involves identifying the source of the leak, fixing it, and replacing damaged materials. The cost can vary significantly depending on the extent of the damage, ranging from $300 to $1,500 or more.

Fixing Sagging Ceilings: Sagging ceilings may require structural reinforcement and replacing damaged sections. Repairing a sagging ceiling can cost between $500 and $2,000, depending on the extent of the sagging and the necessary repairs.

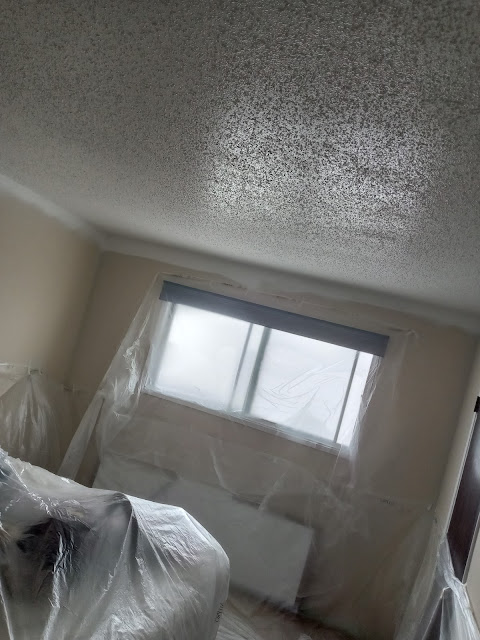
Removing Popcorn Ceilings: Popcorn ceilings, a popular style in older homes, often require removal due to their outdated appearance and potential health hazards. The cost of removing popcorn ceilings typically falls in the range of $1 to $3 per square foot.

Tips for Saving Money on Ceiling Repairs:

While ceiling repairs can be costly, there are several ways to save money without compromising the quality of the work:

Promptly Address Issues: Addressing ceiling problems as soon as they arise can prevent further damage, potentially reducing repair costs in the long run.

Obtain Multiple Quotes: It's wise to seek quotes from multiple contractors to compare prices and ensure you're getting a fair deal. However, remember that the cheapest option isn't always the best, so consider the contractor's reputation and experience as well.

DIY Repairs: For minor ceiling repairs, such as small cracks, you may be able to tackle the job yourself with the help of online tutorials and basic tools. However, be cautious not to take on tasks beyond your skill level, as this could lead to costly mistakes.

Regular Maintenance: Performing routine maintenance on your ceiling, such as cleaning, repainting, and checking for signs of moisture or structural issues, can help identify and address problems early on, potentially saving you from more extensive and expensive repairs.

Insurance Coverage: If the damage to your ceiling is a result of a covered peril, such as a burst pipe or severe weather, check with your homeowner's insurance provider to determine if the repairs are covered under your policy. This can help alleviate some of the financial burden.

Conclusion:

Ceiling repairs are a common aspect of home maintenance, and understanding the potential costs involved is essential for homeowners. Factors such as the type and extent of damage, ceiling height, material, and accessibility all influence the overall repair expenses. By familiarizing yourself with different repair types and their approximate costs, you can better plan your budget. Remember to explore ways to save money, such as addressing issues promptly, obtaining multiple quotes, considering DIY options for minor repairs, and performing regular maintenance. By taking these factors into account, you can effectively manage ceiling repair costs and ensure a safe and aesthetically pleasing home environment.

Saturday, June 10, 2023

Effective Strategies for Painting Over Water Stains on Walls and Ceilings

Effective Strategies for Painting Over Water Stains on Walls and Ceilings

Water stains on walls and ceilings can be unsightly, but with the right approach, you can easily restore the appearance of your surfaces. Painting over water stains requires proper preparation and techniques to ensure a smooth and long-lasting finish. In this article, we will provide you with practical tips and guidelines to help you effectively tackle water stains and achieve a beautifully painted surface.

Identify the Cause and Fix the Water Leak:

Before you start the painting process, it's crucial to identify and address the source of the water leak. This step is essential to prevent future damage and ensure that your efforts won't go to waste. Inspect the affected area carefully and repair any leaks or plumbing issues before proceeding with the painting project.

Prepare the Surface:

To achieve a flawless paint finish, proper surface preparation is key. Start by cleaning the stained area with a mild detergent or a solution of bleach and water to remove any dirt, mold, or mildew. Allow the surface to dry thoroughly before proceeding. If there are any loose or peeling paint, scrape it off gently and sand the area to create a smooth surface for painting.

Apply a Stain-Blocking Primer:

Water stains can be stubborn and may continue to seep through the fresh paint if not treated properly. Applying a stain-blocking primer is crucial in preventing the stains from reappearing. Choose a high-quality primer that specifically addresses water stains. Apply it evenly over the affected area, extending slightly beyond the stained portion. This will ensure that the stains are completely sealed and won't bleed through the new coat of paint.

Select the Right Paint:

Choosing the appropriate paint is essential to achieve a seamless and uniform appearance. Opt for a high-quality latex paint with a sheen level that matches the surrounding surface. It's recommended to select a paint color that closely matches the existing wall or ceiling to avoid noticeable differences. If necessary, consult a paint specialist or bring a sample of the old paint to ensure a good color match.

Apply Multiple Coats:

To effectively cover water stains, it's often necessary to apply multiple coats of paint. Begin by cutting in around the edges of the stained area with a brush, ensuring a smooth transition between the old and new paint. Then, use a roller to apply the paint evenly over the rest of the surface. Allow each coat to dry completely before applying the next one. Be patient and follow the manufacturer's instructions for drying times between coats.

Evaluate and Touch Up:

Once the final coat of paint has dried, carefully inspect the painted surface for any remaining water stain marks or color variations. If necessary, apply additional coats of paint or touch up specific areas to achieve a consistent finish. Take your time during this step to ensure the best possible outcome.

Conclusion:

Painting over water stains can be a straightforward process with the right approach. By addressing the root cause of the water damage, preparing the surface properly, using a stain-blocking primer, selecting the right paint, and applying multiple coats, you can effectively restore the appearance of your walls and ceilings. Remember to take your time, follow the recommended steps, and enjoy the satisfaction of a beautifully painted surface, free from water stains.

Sunday, June 4, 2023

Avoid These Common Mistakes When Painting Your Ceiling

Avoid These Common Mistakes When Painting Your Ceiling

When it comes to interior design, the ceiling often plays an overlooked role. However, with the right paint color and finish, it can transform a room and add a touch of elegance. Nevertheless, ceiling painting can be a challenging task, especially if you're unfamiliar with the process. To ensure a smooth and successful ceiling painting project, it's crucial to avoid common mistakes that can hinder your desired results. In this article, we will guide you through some prevalent ceiling painting mistakes and provide helpful tips to help you achieve a flawless finish.

Neglecting Surface Preparation:

One of the most common mistakes people make when painting their ceilings is neglecting proper surface preparation. Failing to prepare the ceiling adequately can result in a poor paint adhesion, uneven coverage, and visible imperfections. Before you begin painting, make sure to clean the ceiling thoroughly, removing any dust, dirt, or grease. Additionally, inspect the surface for cracks, holes, or other damages, and repair them using spackle or joint compound. Properly priming the ceiling will also help the paint adhere better and provide a uniform finish.

Not Using the Right Tools:

Using the wrong tools can lead to a frustrating painting experience and subpar results. When painting a ceiling, it's essential to invest in the right tools to make the process easier and more efficient. A sturdy ladder or scaffolding will enable you to reach all areas of the ceiling comfortably. Opt for an extension pole to attach to your paint roller, as it will allow you to cover large areas without straining yourself. Additionally, select a high-quality paint roller with a nap length suitable for the texture of your ceiling. This will ensure even coverage and a smooth finish.

Choosing the Wrong Paint Color:

Selecting the right paint color for your ceiling is crucial to create the desired atmosphere in a room. Many homeowners make the mistake of choosing pure white for their ceilings without considering other options. While white can work well in certain situations, it's worth exploring alternative colors to complement your overall interior design scheme. For instance, using a lighter shade of the wall color can create an illusion of spaciousness, while a darker hue can add depth and coziness to the room. Take your time to test different color samples and observe how they interact with the lighting in your space.

Poor Lighting Consideration:

Lighting plays a significant role in how your ceiling color appears. Neglecting lighting considerations can lead to disappointment with the final result. Before finalizing your paint color choice, evaluate how natural and artificial light sources affect your ceiling. Different light intensities can alter the perceived color, making it appear lighter or darker. Consider the direction of light and its impact throughout the day. It's advisable to test paint samples on the ceiling and observe how they look under various lighting conditions before committing to a color.

Inadequate Protection:

Painting a ceiling can be a messy task, and failing to adequately protect your furniture, floors, and other surfaces can lead to unnecessary damage. Use drop cloths or plastic sheeting to cover the entire floor area, furniture, and any fixtures beneath the ceiling. It's also recommended to remove or cover light fixtures, ceiling fans, and other accessories to prevent them from getting splattered with paint. Taking the time to protect your surroundings will save you from the hassle of cleaning up or repairing accidental paint splatters later.

Conclusion:

Avoiding these common ceiling painting mistakes will help you achieve a flawless finish and create a beautiful and harmonious living space. Remember to invest time in proper surface preparation, choose the right tools, consider alternative paint colors, pay attention to lighting, and adequately protect your surroundings. By following these tips, you'll be well-equipped to tackle your ceiling painting.

Thursday, June 1, 2023

Understanding the Optimal Number of Primer Coats for Your Painting Project

Understanding the Optimal Number of Primer Coats for Your Painting Project

When embarking on a painting project, it's essential to give careful thought to the role of primer. Primer serves as a preparatory layer that enhances adhesion, improves paint durability, and promotes a smoother finish. One common question among homeowners and DIY enthusiasts is: "How many coats of primer do I need?" In this article, we will delve into the factors that influence the number of primer coats required for a successful painting endeavor.

Factors Influencing the Number of Primer Coats:

Surface Condition:

The condition of the surface you plan to paint plays a crucial role in determining the number of primer coats needed. If the surface is new, unpainted, or previously uncoated, it generally requires more primer to achieve optimal results. Surfaces that are porous, uneven, or have undergone significant repairs might also benefit from additional primer coats to create a consistent base.

Color and Texture:

The color and texture of the surface you are painting can affect the number of primer coats necessary. When transitioning from a dark or vibrant color to a lighter shade, using a primer can help prevent the previous color from bleeding through. Similarly, surfaces with a rough or uneven texture may require multiple primer coats to ensure a smooth and even paint application.

Paint Type:

The type of paint you plan to apply after priming can influence the number of primer coats required. For example, when using high-gloss or oil-based paints, additional primer coats may be necessary to enhance adhesion and create a uniform surface. It is essential to consider the compatibility of the paint and primer to achieve the desired finish.

Desired Outcome:

The desired outcome of your painting project is another crucial factor in determining the number of primer coats needed. If you aim for a flawless, professional finish, investing in multiple primer coats can help minimize imperfections, enhance color accuracy, and improve the longevity of the paint job. On the other hand, if you are working on a less visible area or a temporary project, fewer primer coats may suffice.

Expert Recommendations:

While there is no universal rule for the exact number of primer coats needed, experts recommend applying at least one coat of primer in most cases. This foundational layer helps ensure the paint adheres well and provides a consistent base for a smoother finish. However, in some situations, such as those mentioned above, applying two or more coats of primer may be beneficial.

Conclusion:

Understanding the factors that influence the number of primer coats required can help you make informed decisions for your painting projects. Assess the surface condition, consider the color and texture, choose the appropriate paint type, and determine your desired outcome. By taking these factors into account, you'll be better equipped to decide whether to apply a single coat of primer or invest in multiple coats to achieve a flawless and long-lasting paint job.

12 top interior painting tips from experts – for a flawless, fabulous finish

12 top interior painting tips from experts – for a flawless, fabulous finish

Achieving a beautifully painted interior requires careful planning, preparation, and execution. Whether you're embarking on a full room makeover or refreshing a small space, these essential interior painting tips will help you achieve stunning results. From selecting the right paint to mastering proper techniques, this guide will equip you with the knowledge needed to transform your home into a haven of color and style.

Choose the Perfect Paint:

Selecting the right paint is crucial to achieving a flawless finish. Consider factors such as the room's purpose, lighting, and existing décor. Opt for high-quality paint with the right finish for your desired effect. Matte finishes are great for hiding imperfections, while satin or semi-gloss finishes offer durability and easier maintenance.

Prepare the Surface:

Preparing the surface is a crucial step that ensures optimal paint adhesion and a smooth, professional look. Start by cleaning the walls to remove dust, dirt, and grease. Repair any cracks or holes with spackle and sand the surface for an even texture. Use painter's tape to protect trim, windows, and other areas you want to keep paint-free.

Prime for Perfection:

Priming is an often-overlooked step, but it provides a solid foundation for your paint and improves its coverage. Primer helps hide stains, promotes paint adhesion, and ensures true color representation. Apply primer to bare walls or surfaces with uneven color, and allow it to dry completely before painting.

Practice Proper Techniques:

Mastering proper painting techniques is essential for achieving professional-looking results. Start with a cutting-in technique, where you use a brush to create crisp lines along edges, corners, and trim before using a roller for larger areas. Apply paint in even strokes, working from top to bottom, and maintain a wet edge to avoid visible brush or roller marks.

Don't Skimp on Tools:

Investing in high-quality painting tools is worth every penny. Quality brushes and rollers ensure smooth application and help you achieve a flawless finish. Choose brushes with fine bristles for precision, and use roller covers appropriate for the surface and paint type. Good tools save time, reduce frustration, and yield better results.

Apply Multiple Coats:

For a professional-grade finish, apply multiple thin coats of paint rather than one thick coat. Thin coats dry faster, adhere better, and minimize the risk of drips and visible brush marks. Allow each coat to dry completely before applying the next, following the manufacturer's recommended drying time.

Ventilate the Space:

Proper ventilation is crucial when painting indoors to ensure a healthy environment and aid in the drying process. Open windows and doors, use fans, and consider using air purifiers to circulate air and remove paint fumes. This helps prevent odors and provides a comfortable space for both you and the paint.

Clean and Store Properly:

Once your painting project is complete, clean your brushes, rollers, and other tools thoroughly. Use soap and water for water-based paints or appropriate solvents for oil-based paints. Properly store your tools to keep them in good condition for future use.

Conclusion:

Interior painting is an excellent way to transform your living spaces and infuse them with your personal style. By following these essential tips, you'll be well-equipped to achieve stunning results. Remember to plan, prepare, and practice proper techniques for a flawless finish that enhances the beauty of your home. Happy painting!

Featured Post

Choosing Your Home's Perfect Palette: A Guide to Exterior House Colour

Does your home yearn for a fresh and inspiring exterior? A well-chosen colour palette, expertly applied, can transform your house from or...

Popular Posts